Disable User Accounts in Window 10
Windows 10 allows its users to create multiple User Accounts, in order to allow users to share a common device and still have their own desktop settings, individual files and bookmarks. Whenever a User Account is no longer needed, it can be safely deleted using Settings app in Windows 10. But, what if you only want to disable certain User Accounts for a limited period of time and not delete those Users Accounts. Disabling User Accounts in Windows 10, without deleting the Accounts can be done using the following methods.
1. Disable User Accounts in Windows 10 Using Computer Management
Those using Professional or Enterprise Edition of Windows can use Computer Management to restrict access to an account. Windows Home Edition users can refer to the second method.
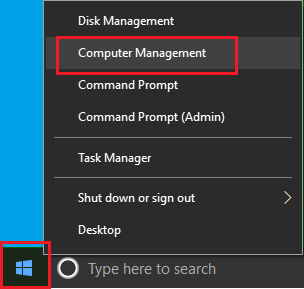
- Right-Click on the Start button and click on Computer Management in the menu that appears.
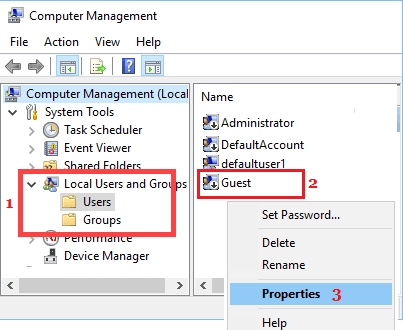
Note: You can also press Windows + X key shortcut to access Computer Management. 2. On the Computer management screen, navigate to System Tools > Local Users and Groups > Users
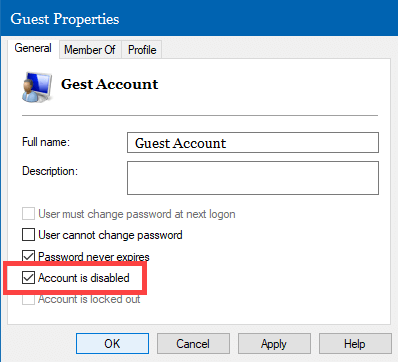
3. Right-click on the User Account that you want to disable and click on Properties. Note: If the user account is using a Microsoft account, the User name will only have the first five letters of the Email address 4. On the Account Properties screen, click on the General tab and select Account is disabled option.
- Click on Apply and OK. After this, the selected User Account will no longer be accessible. Also the user account will not appear as an available account on the sign-in screen. At any time, you can enable access to the blocked account by unselecting Account is Disabled option.
2. Disable Windows 10 User Account Using Command Prompt
Windows Home Edition users can easily disable any Windows 10 User Account by using Command Prompt.
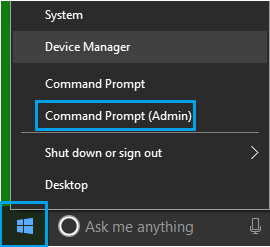
Right-click on the Start button and then click on Command Prompt (Admin option)
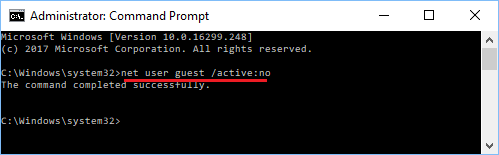
On the Command Prompt window, type net user username /active:no and press the enter key to disable User Account.
Tip: You can type net user and hit the enter key to bring up list of all accounts using your computer As you can see in the image above, we are disabling a User Account named Guest by executing the command net user guest /active:no. In your case, make sure that you replace Username with the name of the Account that you want to disable. After executing this command, the User Account that you just disabled will no longer be accessible and it will also be not listed on the sign-in screen. At any time you can re-enable the User Account by typing net user username /activate:yes command.
How to Create a Local User Account in Windows 10 How to Create Guest User Account in Windows 10