Enable Remote Desktop in Windows 10
As mentioned above, you need to Enable Remote Desktop feature on your computer, in order to be able to access your computer from another computer, located far away from your computer. The downside of enabling Remote Desktop Connection is that it makes your computer vulnerable or open to remote attacks. However, you can enforce Network Level Authentication, Strong Passwords and other security measures to limit this risk. Unfortunately, Remote Desktop feature is not available in Windows 10 Home, it can only be enabled on computers running Windows Pro, Windows Enterprise and Windows Server. Although, Windows 10 Home is equipped with Remote Desktop Client Software, it lacks the propriety RDP server from Microsoft, required for accessing remote computers.
1. Enable Remote Desktop Using Settings
The easiest way to Enable Remote Desktop connection in Windows 10 is by going to Settings on your computer.
- Go to Settings > System.
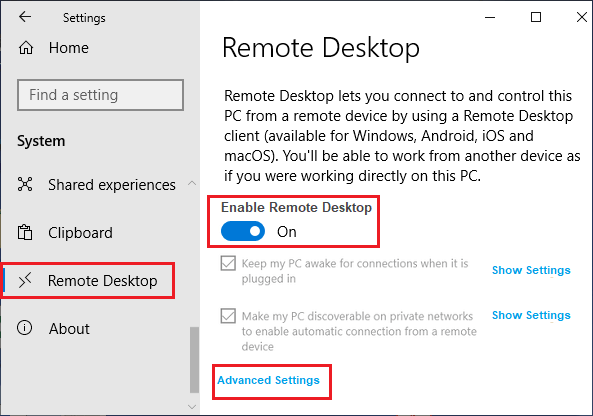
- Select Remote Desktop in the left-pane. In the right-pane, move the toggle next to Remote Desktop to ON position.
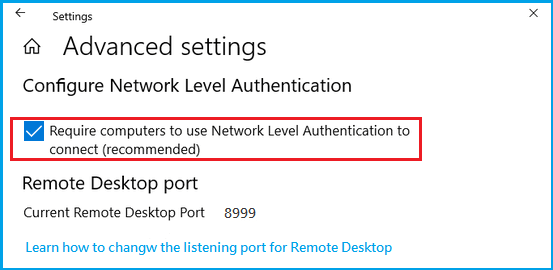
Note: Make sure “Keep my PC awake for connections when it is plugged in” option is selected or you will have to change Power Settings on your computer. 3. On the confirmation pop-up, click on Confirm. 4. On the same screen, click on Advanced Settings and enable Network Level Authentication.
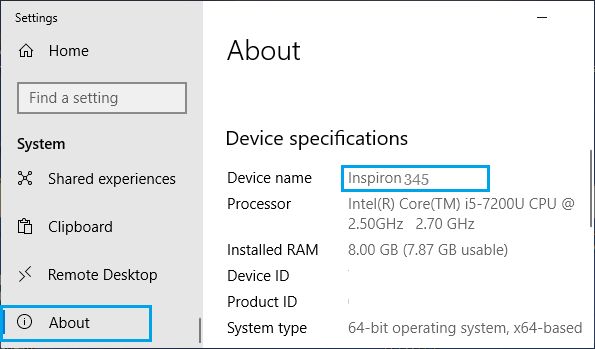
After enabling Remote Desktop Connection, go to Settings > System > About and note down the Name of your computer.
The Name of a Computer is required to connect to a computer from a Remote Location. Another way to connect to Remote Desktop is by using IP Address of the computer.
2. Enable Remote Desktop Using Sysdm.cpl
This method checks the power settings on your computer and prompts you to change power settings, if they are not compatible.
Type sysdm.cpl in the Search bar and select sysdm.cpl Control Panel Item.
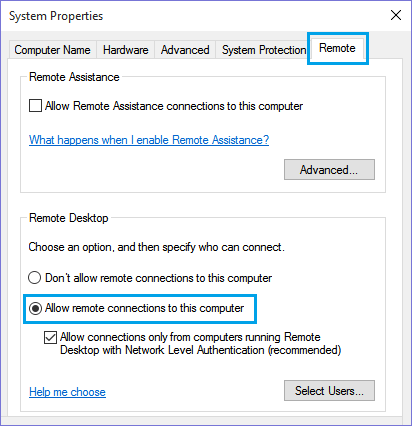
On System Properties screen, select the Remote tab > check Allow Remote connections to this computer option.
Click on Apply and OK to save this setting on your computer. As mentioned above, you will be prompted to change Sleep Settings on your computer, if they are not compatible.
3. Enable Remote Desktop Using Control Panel
If you like using the Control Panel, you can enable RDP using the following steps.
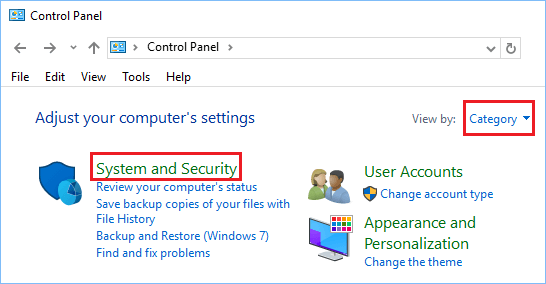
Open Control Panel > click on System and Security.
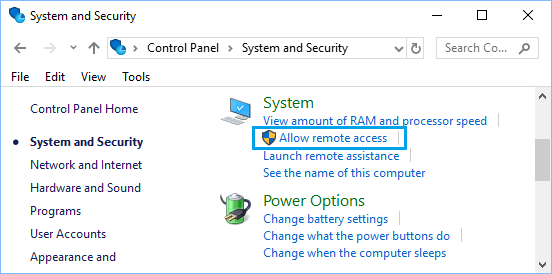
On System and Security Screen, click on Allow Remote Access option.
On the next screen, select Allow Remote connections to this computer option.
Click on Apply and OK to save this setting on your computer.
4. Enable Remote Desktop Using Run Command
Another way to Enable Remote Desktop connection is by going to System Properties screen using the Run Command.
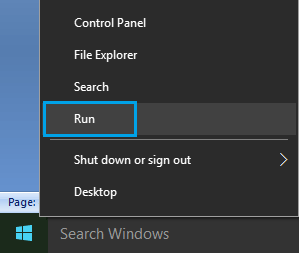
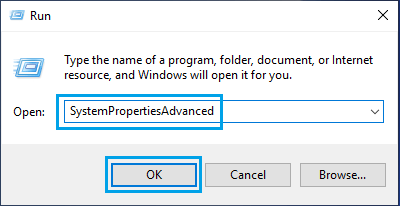
Right-click on the Start button and click on Run.
In Run Command window, type SystemPropertiesAdvanced and click on OK.
On System Properties screen, select the Remote tab > check Allow Remote connections to this computer option and click on Apply and OK.
Note. You may be prompted to change Sleep Settings on your computer, so that your computer never goes to sleep. Once Remote Desktop is enabled, you will be able to access your computer from remote location using Remote Desktop Protocol (RDP).
How to Protect Windows Computer From Remote Attacks How Access Remote Computer Using RDP